A look into everyone’s favorite Drag technique! (+ how to pictures)
What is Baking? & Where/Why should you do it?
Baking is a drag technique used to help keep your concealer from creasing, leaves a pore-less/smooth look, and many claim it helps their concealer stay fuller coverage longer. Baking allows your skin temperature to help melt the product into your skin, letting it be one with your skin. It warms up the product becoming more emollient so it sets better.
It’s the most popularly used as an under eye technique. People do it under their contour as a quick clean up. It can also be done where ever you highlighter with concealer like the bridge of nose, chin, and center of forehead.
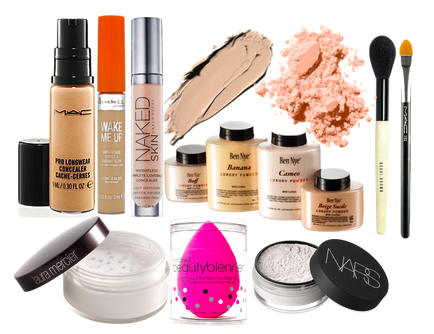
What do you need?
- Concealer
- Loose powder (translucent / “highlight” like ben nye luxury powders aka a powder a few shades lighter than your skin tone)
- Fluffy Brush
- Stiffer face brush
- Extras: beauty blender or cosmetic sponge
How do you do it?
Blank Canvas:
- Apply your foundation like always.
- I like to have my eye makeup done before hand to avoid fall out darkening the highlighted look.
- Apply your concealer.
- Apply it to the areas you wanted “baked”. As always it’s recommend you do it in the triangle shape when under your eyes. You can also bake your T-zone if you highlight those areas with concealer as well. (Bridge of nose, chin, center of forehead)
- Blend in your concealer with your fingers (personal preference) or a damp beauty blender sponge.
- Immediately apply powder before any creasing starts.
- I like to do a light layer, “normal” setting first.
- Next pack on a loose powder. You want to be able to clearly see the powder. I use a stiffer face brush but may use their damp beauty blender or cosmetic sponge.
- Wait 10-20 mins.
- This is a perfect time to do your hair or eyes. (As I said before I like to do my eyes before to avoid fallout.)
- Remove excess powder with a fluffy brush. Do light sweeping motions “kicking” up the excess powder and you’re done!
- If you are a deeper complexion when you’re removing the excess powder tap a bit of your normal powder onto the fluffy brush. Then remove the excess powder. By having a bit of your normal complexion powder “mixing” with the very light powder it helps blend away any harsh lines the baking might of left. Plus sometimes you’ll find the highlighted look can look to stark depending on what powder you used.
- You can see how much more matte / set the concealer is in the last photo compared to the light dusting/normal amount applied (4th photo).
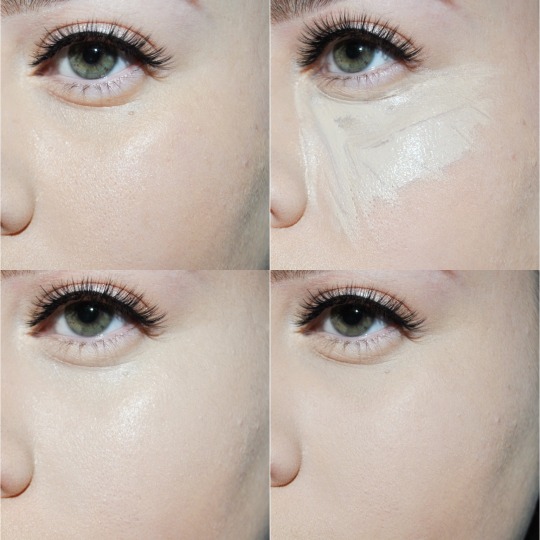
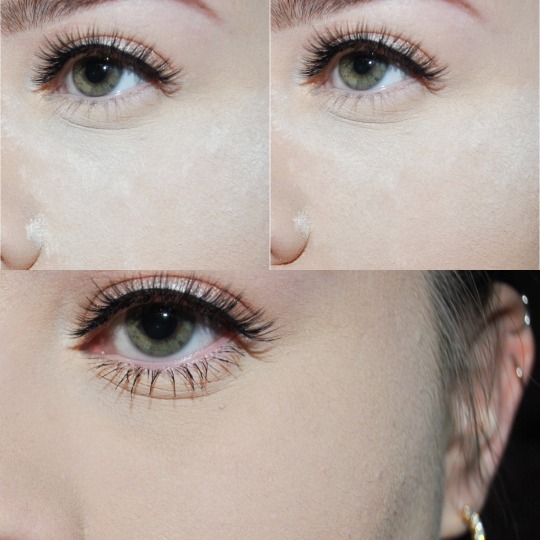
Steps: 1, 2, 3, 4 (light dusting, heavy powder) ,5 (powder after 15 mins), and 6
Cleaning up your Contour:
- Follow the steps above if baking your under eyes / bridge of nose / chin / center of forehead.
- Finish powdering the rest of your face.
- Apply your blush / highlight / contour. (Eye makeup can be done whenever you want before/after foundation as stated above)
- Pack on the powder under your contour, stop about 1-1.5 inches above jaw line (depending on face size). Try your best to keep the powder in a straight line so your contour doesn’t have a jagged line.
- Wait 5-10 mins.
- Remove excess powder with a fluffy brush. Do light sweeping motions “kicking” up the excess powder and you’re done!
- Avoid brushing it up into the contour. Do it in side swipe motions.
- If you are a deeper complexion when you’re removing the excess powder tap a bit of your normal powder onto the fluffy brush. Then remove the excess powder. By having a bit of your normal complexion powder “mixing” with the very light powder it helps blend away any harsh lines the baking might of left. Plus sometimes you’ll find the highlighted look can look to stark depending on what powder you used.
- After wards you will notice it helped sharpen your contour without applying more creamy products. Cleaning up any blending that went a tad below your cheekbones. It will help your contour from moving / smudging downwards through out the day too.
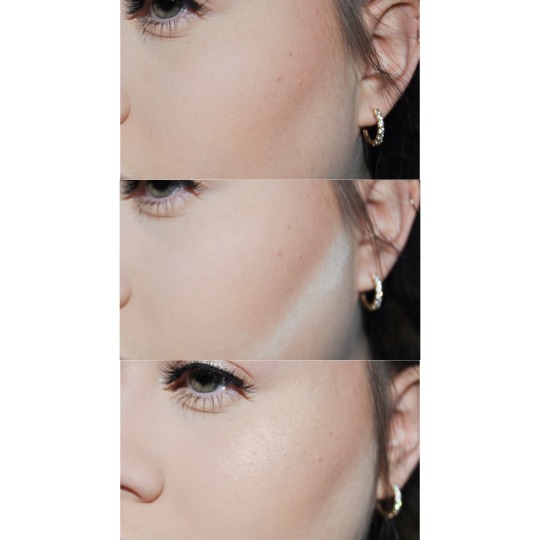
Steps 1, 2, and 4
No comments:
Post a Comment